Recycle Challenge Winner! DIY Plastic Lantern
27 May 2015

Drum roll please! WE HAVE GOT A WINNER!

Congratulations to Leslie Anne Monzon of Las Piñas City for winning the Recycle Challenge Contest! She has shared with us her ingenious idea!
What we love about her project is that the materials are so easy to find and the finished product is really so very useful!
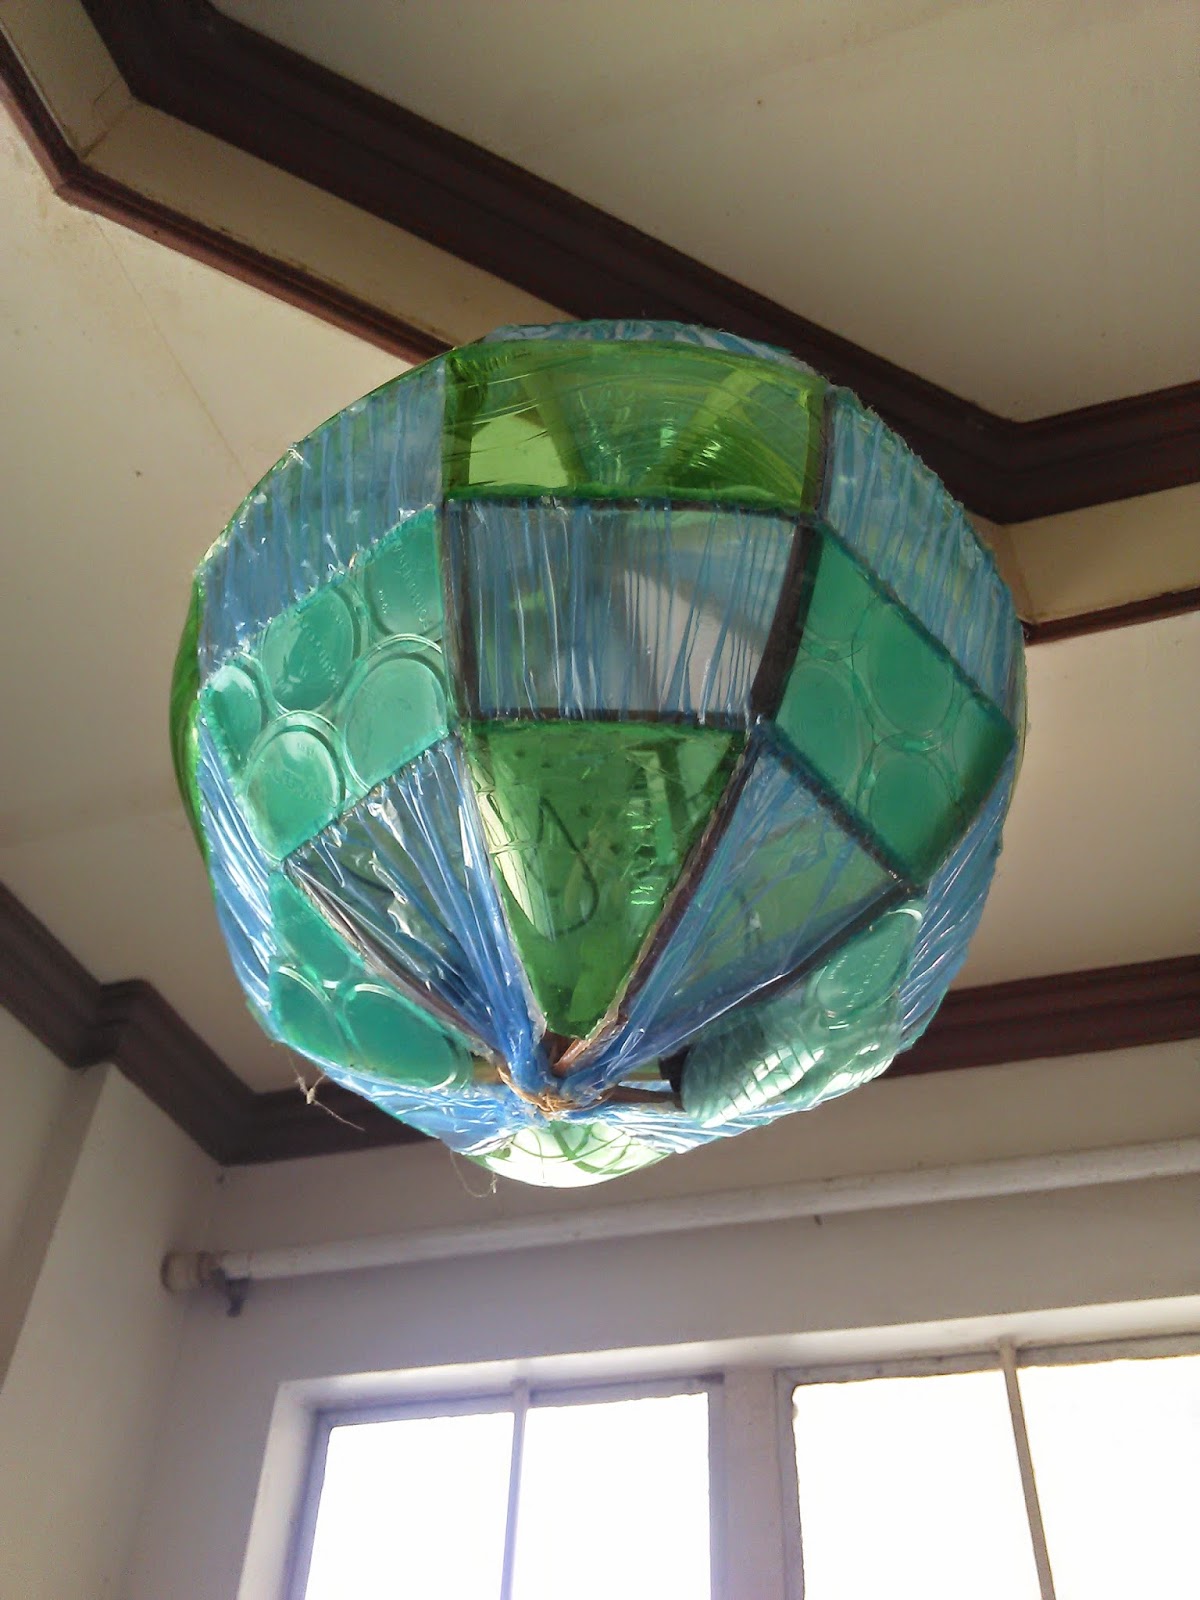
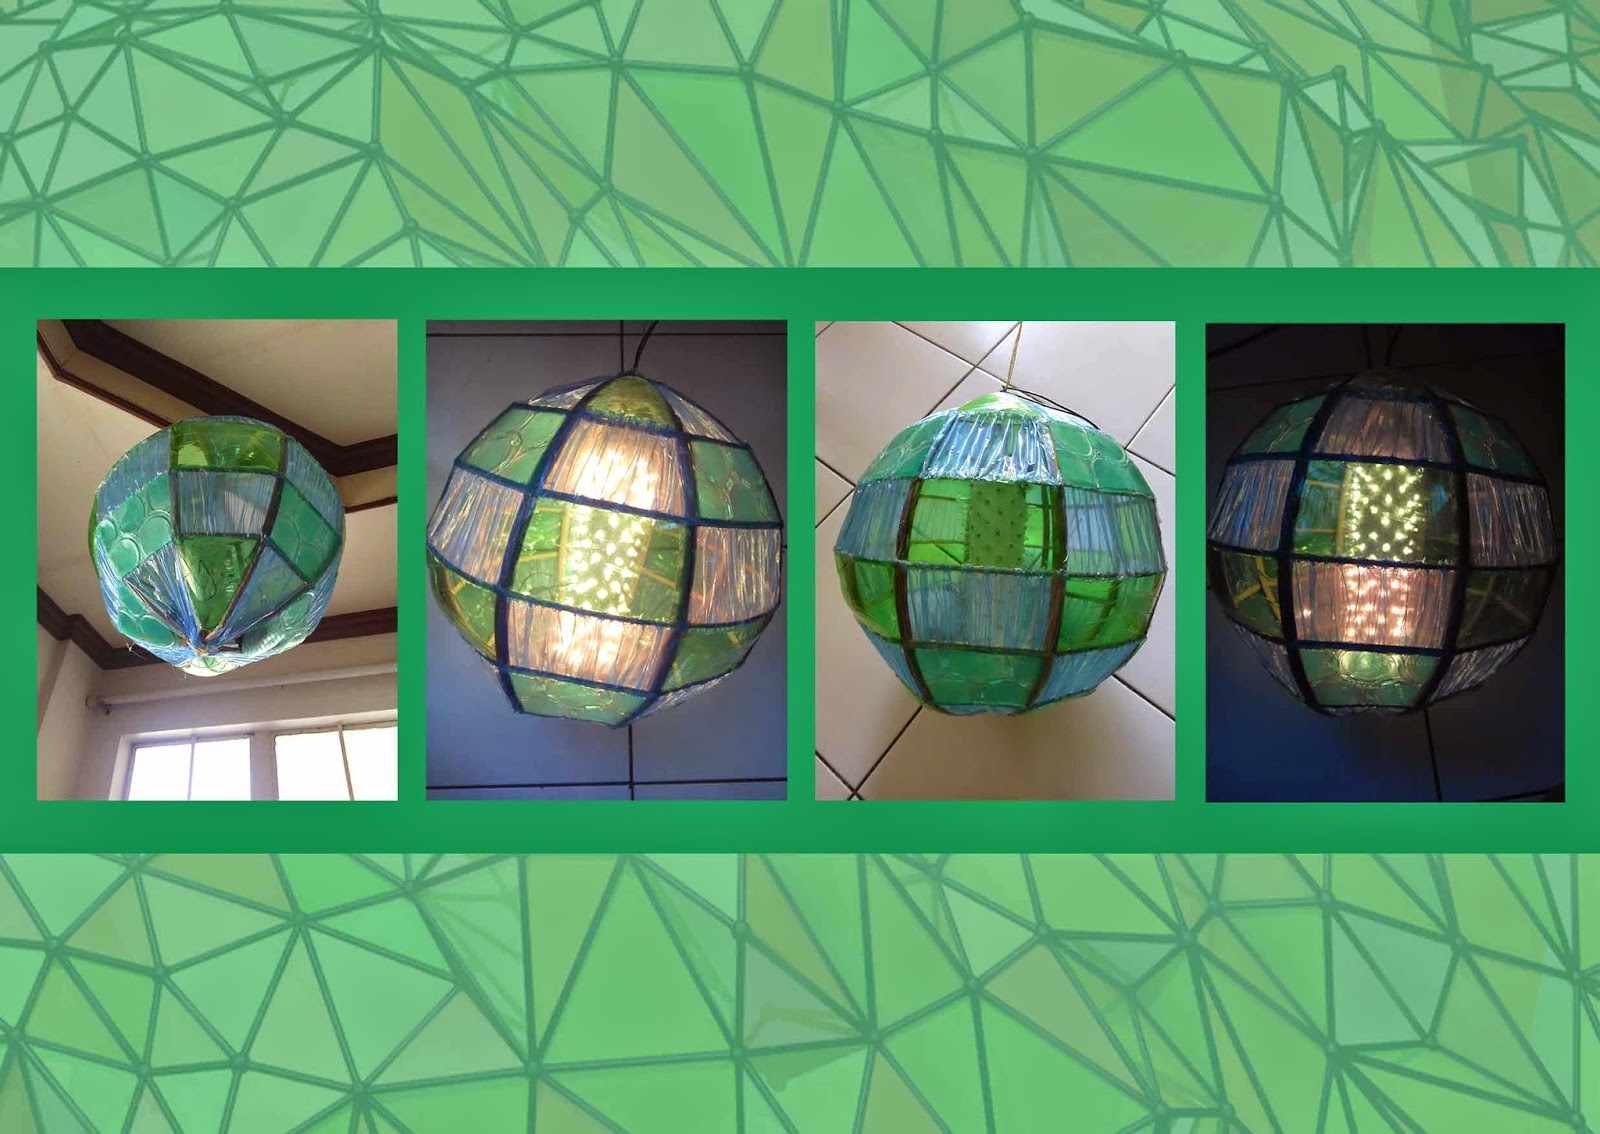
Leslie Anne says, "This lantern is basically made out of an old bilao, plastic bottles, plastic cups and plastic bags. The lantern is inspired by the earth, considering its shape and colors. My finished work is now hanging in our living room."

MATERIALS NEEDED:
OLD BILAO OR WOVEN TRAY
EMPTY COLORED PLASTIC BOTTLES (1-2 LITERS)
COLORED PLASTIC BAGS
COLORED PLASTIC CUPS (TRANSPARENT)
CARDBOARD / ROLLED TISSUE TUBE
CHRISTMAS LIGHTS
STRING
GLUE GUN
WHAT TO DO:
THE SPHERE
1. Disassemble the bilao and take out the bamboo strips. (The bamboo strips will be used as the skeleton for the lantern.)
2. Create a sphere shaped frame/ skeleton using the bamboo strips and strings. You will have to decide how many strips you want to use for the frame/skeleton. The more the strips are, the more durable the frame will be.
3. Cut out the colored plastic bottles, the bottom of the colored plastic cups and the colored plastic bags into shapes that will fit the resulting hole pattern of the frame.
4. Stick the cut out plastic bottles and plastic bags using the glue gun to cover the holes. (Leave at least two (2) holes uncovered so that there will be an access when you put the lighting element inside.
THE LIGHT
1. Using the cardboard: Create holes with sizes and number enough for each Christmas light bulbs to be inserted in the cardboard.
* Using a rolled tissue tube: Create holes with sizes and number enough for each Christmas light bulbs to be inserted from the inside.
2. Insert the Christmas light bulbs through the holes.
3. Leave at least a half inch for each of the ends of the cardboard without Christmas light bulbs.
4. Connect the extra inches of the cardboard to make it into a tube.
5. Make sure that all the cables are inside the tube to make it look neat.
FINAL ASSEMBLY
1. Insert the finished tube lighting element inside the sphere through the uncovered holes of the sphere.
2. Tie up the lighting element at the top and bottom of the sphere so that it won't move inside the frame.
3. Tie up an extra string at the top of the sphere so that you can hang it in your bedroom or in the living room.
4. Make sure that the Christmas light plug is outside so that you can now light it up.

Thank you Leslie Anne!
We hope you guys will try this project and provide a way to reduce the landfills of plastic!
Do you have recycling projects you wish to feature here? Just send it to us at
See more crafts at

Visit us at www.papemelroti.com


