DIY Plant Recycraft
23 Sep 2019
Ever wonder how to beautify your home on a budget? Ever wanted to fill your room with greens but had a brown thumb? Well here is a craft that anyone can do. It will also save the world from more trash!
I don't know about you but I have a brown thumb and I have known to smother plants with too much love! That means I could not stop myself from over-watering them so I have to content myself with cactus plants and succulents which I leave out in the elements for God to take care of. These are the only plants that have survived.
SOURCE: INHABITAT
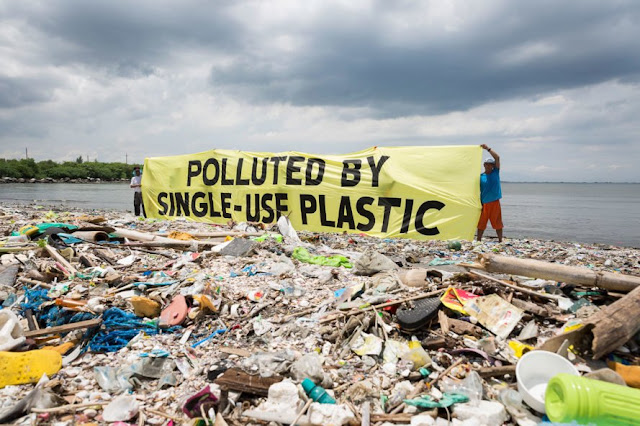
According to Greenpeace, the Philippines was found to be 3rd worst polluter of the world's oceans. Isn't that just awful? It's all because we use plastic only once and then toss it. The Philippines is home to some of the most biodiverse habitats in the world. We Filipinos are unaware of the harm we do when we keep using and not reusing. Plastic can be deadly as it is mistaken as food and entangles wildlife. Can we start making baby steps to help save our oceans and marine life? Can we do it to save ourselves from trash?
This project is just one way we can re-use plastic bottles. Let's not throw those bottles away and try to use our creativity to make something beautiful out of it!
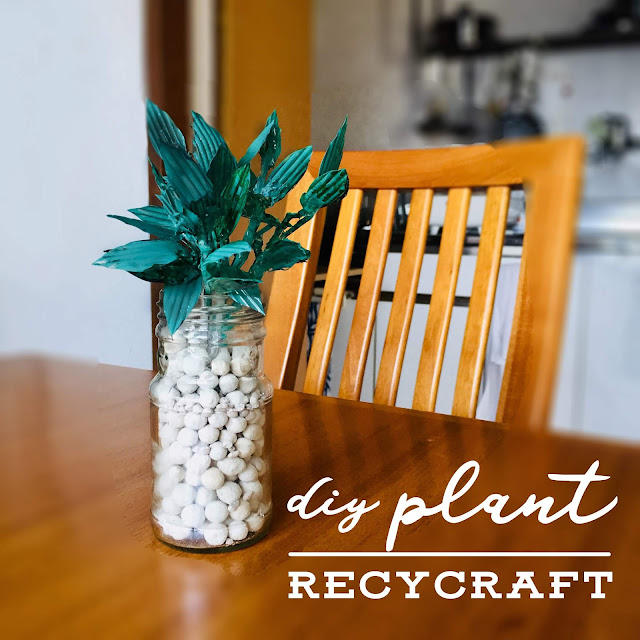
This was my first attempt so... I know it's not exactly flawless but it's a start, don't you think?
DIY Plant Recycraft
Materials:
empty (used) plastic bottle
razor
scissors
marker pen
green spray paint or green nail polish
face mask (optional)
wire clips / wire hangers
glue gun
soil or rocks for base (optional)
glass bottle or vase
razor
scissors
marker pen
green spray paint or green nail polish
face mask (optional)
wire clips / wire hangers
glue gun
soil or rocks for base (optional)
glass bottle or vase
Instructions:
1. Empty the plastic water bottle and remove the label.
2. Run through a razor to make a slit on the bottle. Please be careful.
3. Cutaway the bottom portion of the plastic bottle. Cut across (turning it into a curved sheet) to make it easier to work with.
4. Remove the bottleneck portion too. This is the hardest part of this project so if you do not want to remove it, just cut as close to it as possible or just skip this step.
5. Draw leaf shapes on to the bottle using your marker pen. You may need to make a pattern underneath if you want them to be the exact size.
6. Make a lot! After you have marked the whole bottle area, cut out the leaves.
7. Cut little strips to make into the stem. I used the ridges of the bottle as my guide.
If you want to make guides for the stems with your marker, you can do that as well. Make vertical lines along the plastic bottle. Make them as long as possible.
8. See if you can bend the leaves a little (to emulate real leaves).
9. Cut about 10 stems depending on how many you want.
10. Attach the leaves to the stems using a glue gun. Once again, be careful not to burn yourself.
11. This is the part where the magic begins and the plastic starts to look like leaves! Sharing with you my boo boo. I thought the acrylic would adhere to plastic but the ridges were making the process take too long. So I recommend using spray paint instead. I did nail polish since it seemed the most common material to find.
Mind you, the nail polish is toxic so you should do this outside and ideally, with a face mask.
12. Hang to dry. You won't have to wait long yay!
13. Once dry, put it all together. Find a vase or in my case, a repurposed glass bottle (which used to hold olives).
This plant is quite handy and can be put indoors or outdoors. I want to try different leaf shapes. I want to check how different a smooth plastic bottle will look.
Do you use plastic bottles only once? Want to join the movement of recycling enthusiasts? We hope you will! Show us your project and we will feature it here so others can be inspired and follow suit!
Tell us in the comments below what you think of this project!
See what's new at papemelroti!
 CALEJ https://calej.blogspot.com
Being the youngest in the family, Calej started "working" with papemelroti when she was 7 years old. At the time, she was already gift wrapping for customers. She used the floor as her table because the counter was just too high for her to reach.
Today, she makes designs for a wide range of products, making illustrations for stationery, books, home decor and more. She also loves to create original fonts, poetry and music.
Tags:
