Wrapped in Prayer
14 Sep 2012
As usual, I like using recycled materials.
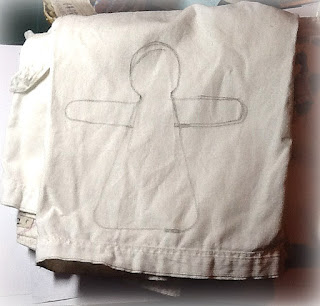
Here is an old pair of canvas pants that I am cutting up
to make into a stuffed doll.
I drew a simple pattern of a doll with a pencil
on the cloth.
on the cloth.
After pinning two pieces of cloth together, I cut it out
leaving a bit of a seam.
Next, I sewed the two pieces of cloth together.
It is important to put notches on the seam so that
when you invert the doll,
the cloth won't bunch up.
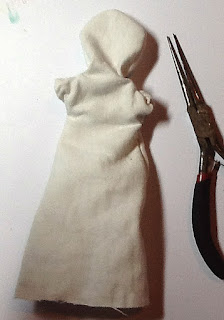
I am now inverting the doll to the right side.
If it is difficult to invert, you can use a
long nosed pair of pliers.
Fill the doll with fiberfill or cotton.
When it comes to the arms,
just put fiberfill or cotton inside the hands,
then sew a knot to keep the cotton in there.
Sew a knot in between the arm and body too
to keep the cotton from migrating to the arm.
The arms will not have any cotton or fiberfill
so it is pliable.
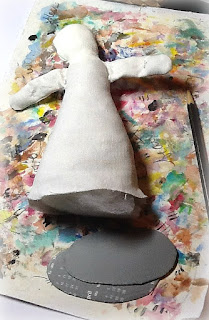
When the body is filled with fiberfill or cotton,
place a stone at the bottom
to add weight.
Cut out two ovals from cardboard
to fit inside the base.
Use a glue gun to glue cloth to the base.
Then glue on the 2nd cardboard oval to cover it up.
Then glue on the 2nd cardboard oval to cover it up.
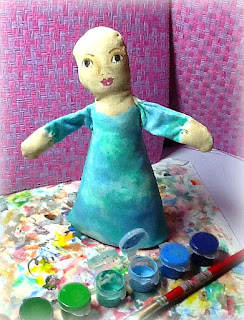
Paint the doll with gesso or wall putty
to make a base for paint.
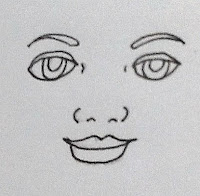
Draw a face.
Or you can use movable eyes
and a button nose if you prefer.
Or feel free to use this template
with carbon paper to trace it
on to your doll.
Paint the face. I used acrylic paints.
I like using two or more shades of the same color
to add interesting splotches.
Also, this hides any imperfections!
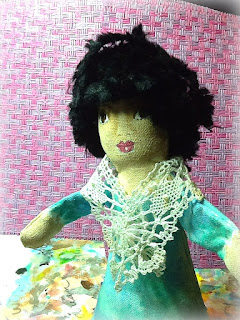
For the hair, I used some scraggly yarn
I unravelled from an old sweater.
I looped the yarn around my fingers,
cut it,and arranged it on her head.
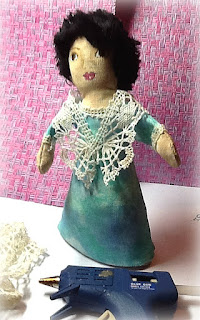
Then I used a glue gun to hold it in place.
The important thing is not to let any bald spots show!!
cut it,and arranged it on her head.
Then I used a glue gun to hold it in place.
The important thing is not to let any bald spots show!!
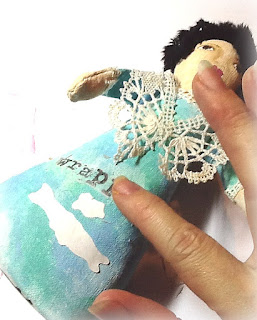
Next, I looked for some lace
and fixed it around her shoulders.
I cut up some small bits for her neckline
and her sleeves.
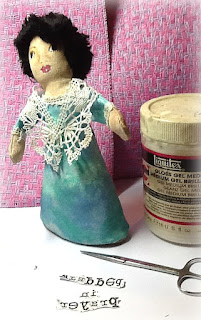
To put words on her dress,
you may write directly on the dress with
a permanent pen.
But I chose to use gel medium.
Make sure your words are inverted and
that you used a copy from a copier
not from a printer.
you may write directly on the dress with
a permanent pen.
But I chose to use gel medium.
Make sure your words are inverted and
that you used a copy from a copier
not from a printer.
Put gel medium on the side with the print.
Glue it on the dress.
Wait 30 minutes.
Glue it on the dress.
Wait 30 minutes.
To remove the paper, dip your finger
in water and rub off.
If some parts of the letters got removed,
like here with the letter e,
like here with the letter e,
just write over it with a permanent pen.
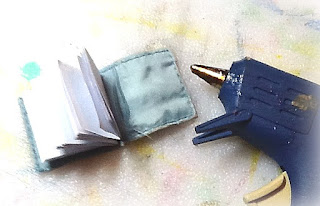
For the little book,
I cut out some leather from an old jacket.
I was so happy to find the leather label
of just the right size!
Make 3 signatures out of any kind of paper.
I used an awl to make the holes,
but you can use an ice pick or even a big needle.
Sew it up with the knot outside the signatures.
Use a glue gun to attach the signatures
to the leather cover.
to the leather cover.
Write prayers inside the little book.
I'm praying that my son, Josh, and his cousin Mark,
will pass the UPCAT, our State University's exam.
I need to pray hard because 70,000 students took it!
I'm praying that my son, Josh, and his cousin Mark,
will pass the UPCAT, our State University's exam.
I need to pray hard because 70,000 students took it!
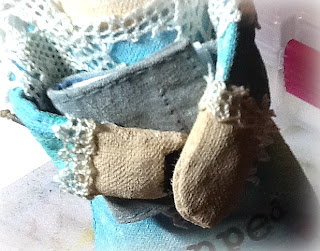
Put velcro on the doll's hands
so that she can hold the Book of Prayers.
so that she can hold the Book of Prayers.
Paint a design on the hem of her skirt.
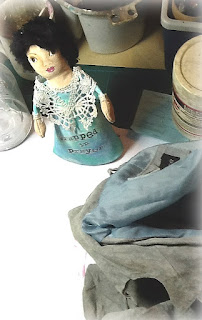
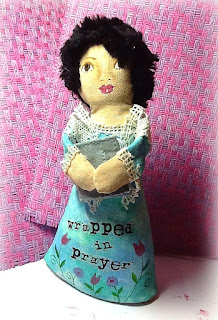
And here she is!
Holding on tight to my prayers!
We appreciate your comments
and I know it takes time and effort,
so we'll pick one comment next week
to win one of our 2013 planners.
The winner of our planner is No. 2 commenter,
Kris of My Life Lessons Diary.
This one says
"Don't forget to wear your invisible crown."
It's one of my favorite designs
(of course that's because it's mine!!!)
If you would like to receive
our monthly newsletters,
and put subscribe in the subject line.
Nifty Thrifty Sunday @ Nifty Thrifty Things
Sundae Scoop @ I Heart Nap Time
Sunday Showoff @ Twigg Studios
Sunday Blog Hop @ Blissful and Domestic
Sunday Spotlight @ Positively Splendid
Sunday's Best @ My 1929 Charmer
Restyled Sundays @ Stylish Once Again
Sister Sunday Linky Party @ Sisters of the Wild West
Just Something I Whipped Up @ The Girl Creative
What's in the Gunny Sack @ Gunny Sack
Inspire Me Monday @ Create with Joy
Martha Mondays @ Watch Out Martha
Mix it Up Monday @ Flour Me with Love
Refashions/ Upcycle Week @ The CSI Project
Craftomaniac Monday @ Craftomaniac
Show Me What Ya Got at Not Just a Housewife
Whatever Goes Wednesday at Someday Crafts
Women Living Well
Works for Me Wednesday
Whatever You Want Wednesday
Tutorials, Tips and Tidbits @ Stone Gable
Wow Me Wednesday @ Gingersnap Crafts
Women Living Well
Works for Me Wednesday
Whatever You Want Wednesday
Tutorials, Tips and Tidbits @ Stone Gable
Wow Me Wednesday @ Gingersnap Crafts
Catch a Glimpse Thursday
Wildly Original @ I Gotta Create
Catch as Catch can @ My Repurposed Life
Pearls and Lace Thursday @ Faith Grace Crafts
Happy Hour Projects
Inspiration Friday @ At the Picket Fence
Frugal Friday @ Shabby Nest
Show and Tell Friday @ Romantic Home
Do Something Crafty @ See Vanessa Craft
Friday Fun Party @ Craftionary
20 Below @ Christina's Adventures
Chic and Crafty party @ The Frugal Girls
Friday Flair @ Whipperberry
Blessings,
Tags:


